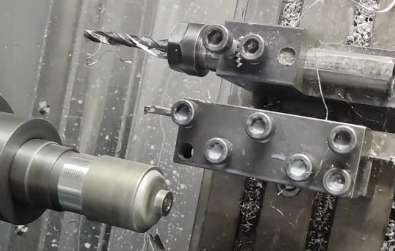
In the arena of metal part machining,the final inspection process is often the most nerve-wracking moment.When a large metal part,which has been meticulously machined for tens of hours,is unloaded from the CNC machine and awaits the"judgment"of the coordinate measuring machine(CMM),the anxiety of the engineers is self-evident—dimensional deviations mean significant losses of material and labor hours.This traditional model,where inspection is separated from CNC machining,has become a key bottleneck in the efficiency improvement of new energy equipment and high-end manufacturing.
Pain Points of Traditional Inspection:The Double Shackles of Efficiency and Precision
Consider these scenarios:
• A massive planetary carrier designed for a new energy wind turbine,after undergoing complex turning and milling operations,is held up in the workshop for several days due to inspection scheduling.
• Metal precision parts lose their reference points due to repeated disassembly and inspection,causing deviations between the measurement results and the actual working conditions.
• Manual sampling inspections conducted by operators working overtime late at night may result in missed inspections due to fatigue,which could potentially create quality risks.
These issues are particularly prominent in the machining of large metal parts.When the part size exceeds the measuring range of conventional inspection equipment,or when complex internal cavity structures need to be inspected,traditional off-machine inspection is not only inefficient but may also introduce measurement errors due to secondary clamping.For metal precision parts machined by turning and milling(such as fuel cell bipolar plates or motor housings),micrometer-level tolerance requirements make manual sampling inspection seem inadequate.
The Core of the Integrated Solution:Real-Time Inspection on the Machine Tool
Real change begins with integrating inspection capabilities directly into the CNC manufacturing process.This integrated solution reconstructs the manufacturing closed loop through three major technological pillars:
• In-Machine Measurement System:High-precision machine tool probes act like"tactile nerves"for CNC equipment.They automatically trigger measurement programs during the machining process,providing real-time feedback on critical part dimensions.A turn-mill compound center can verify the contour accuracy while machining complex surfaces,eliminating the need for part transportation and repositioning.
• Machine Vision Guidance:For areas that are difficult for traditional contact probes to reach,such as deep holes and narrow slots,an integrated optical scanning system can perform non-contact 3D measurements.For example,when machining photovoltaic robot joints,the vision system can automatically capture the thickness data of internal gear walls to ensure the precision of the kinematic pair.
• Digital Twin Closed Loop:Measurement data is transmitted in real time to the digital twin platform,where it is intelligently compared with the design model.The system automatically generates compensation machining code to command the machine tool to make micrometer-level corrections to the over-tolerance points,forming an autonomous closed loop of"machining-measuring-compensating."
Beyond Dimensional Control:Full-Dimensional Value
After deploying the integrated solution for a wind turbine gearbox manufacturer,the yield of large metal parts increased by 23%,and the inspection time was reduced by 65%.However,the value extends far beyond this:
• Enhanced Machining Reliability:Real-time monitoring of tool wear status,with early warnings of tool chipping risks when machining new energy motor rotor shafts.
• In-Depth Process Optimization:Accumulated massive amounts of inspection data reveal the patterns of machining deformation,which in turn guide the optimization of turning and milling parameters.
• Full-Process Traceability:Thousands of inspection data points for each part are automatically archived,providing a digital foundation for product quality traceability.
Manufacturing Paradigm Upgrade in the New Energy Era
In an era that pursues zero-defect manufacturing,the separation of machining and inspection is like using an abacus to handle big data.Especially when the new energy industry demands higher standards for complex components such as large wind turbine main shafts and photovoltaic multi-axis robot joints,the CNC integrated inspection solution is shifting from a technical option to an industry necessity.
This transformation is essentially a reconstruction of the manufacturing logic—shifting the quality control checkpoint from the end to every manufacturing stage,replacing part transportation with data flow,and enabling machine tools to possess both the"craftsman's hand"and the"inspector's eye."When the final millimeter of precision is no longer dependent on manual re-inspection but is embedded in the intelligent genes of the machining system,this is the confidence that high-end manufacturing needs to face the future.